Data Generation
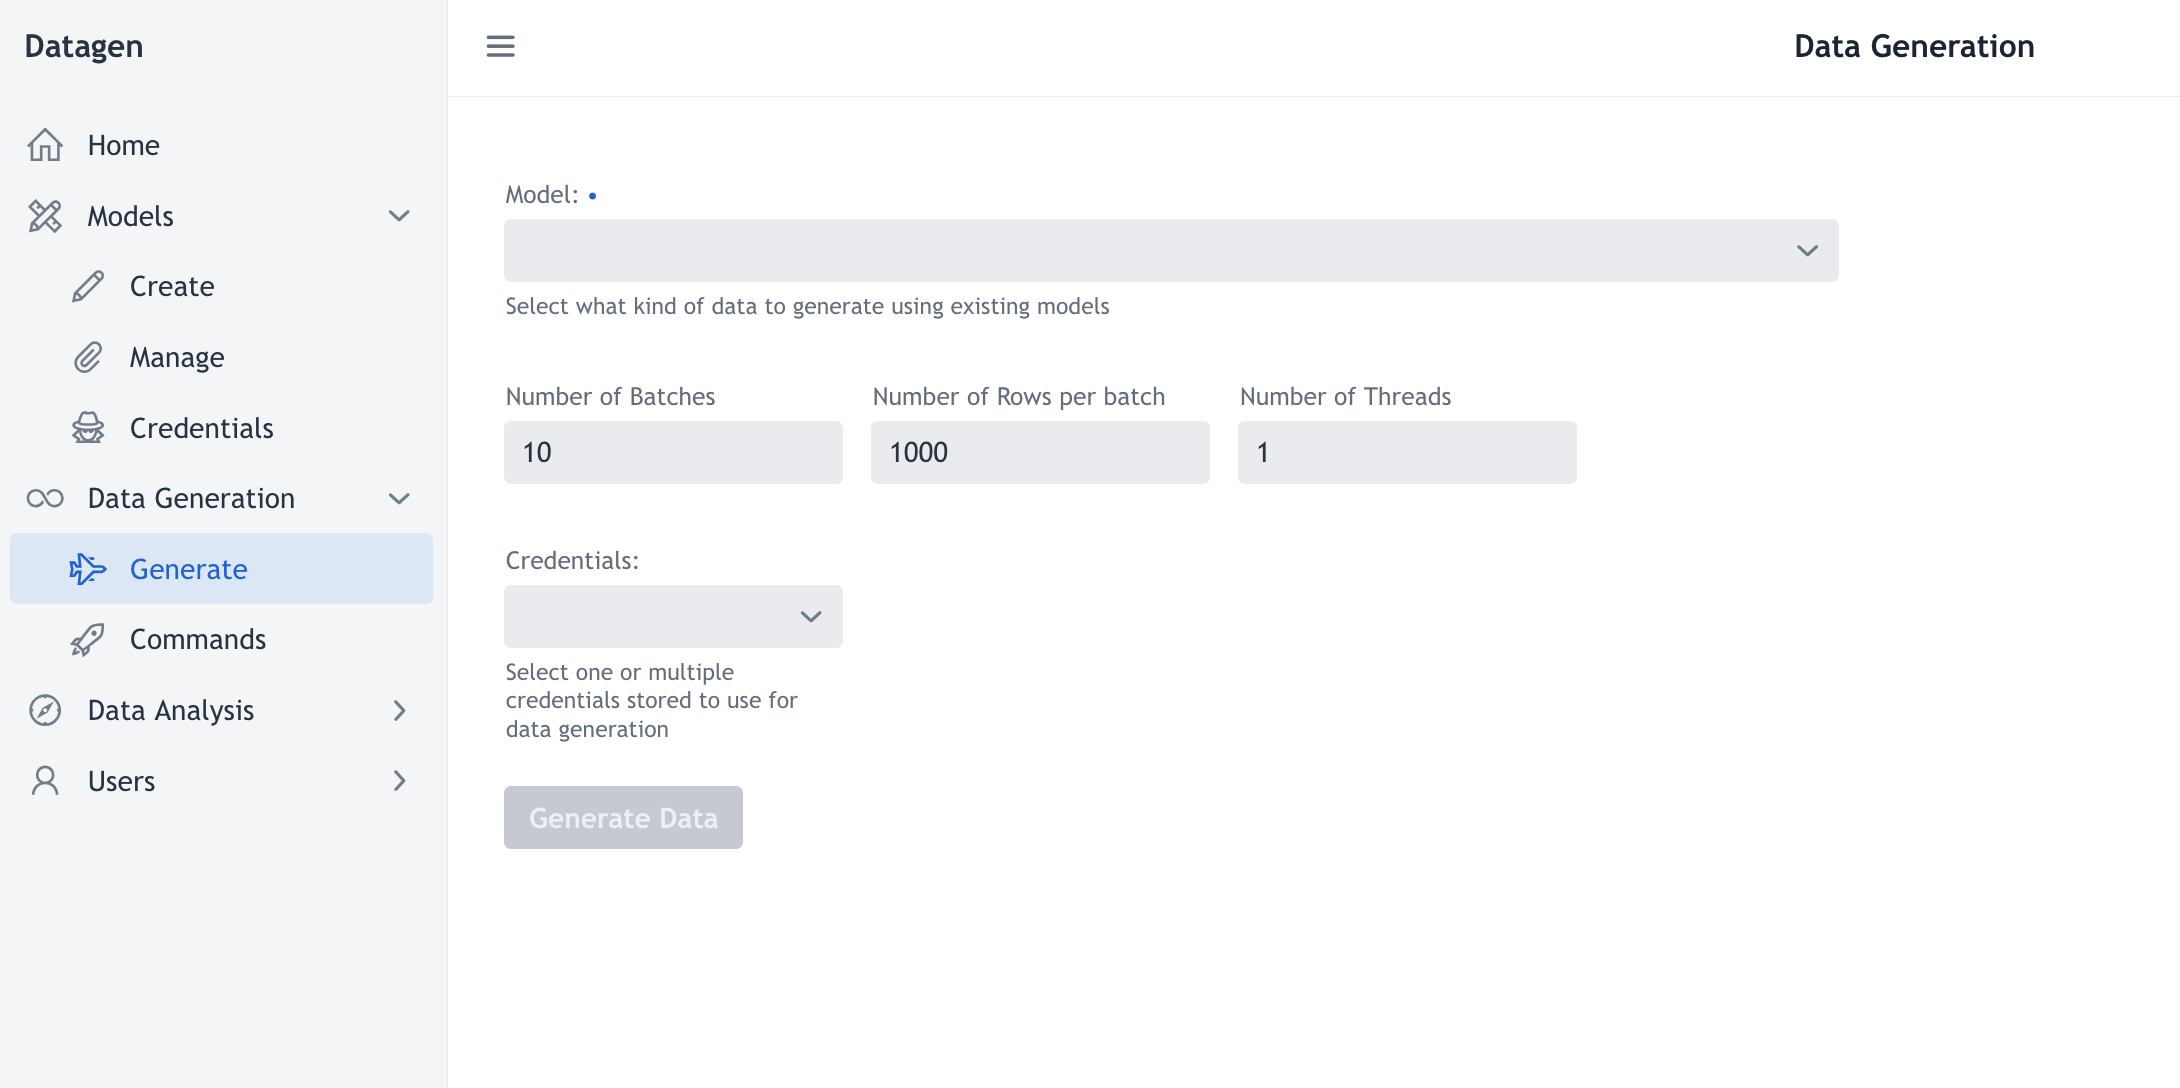
To generate data, click on Data Generation > Generate on left panel.
This UI should be seen:

To generate data, form must be filled:
- Model: Pick up a model among the ones available.
- Connector: Once model has been chosen, a connector drop-down list appear. Pick up the connector where to generate data to.
- Connectors Configuration: Once a connector has been selected some required and optional configurations appears. To know in details, check section ‘Connectors Configuration’
- Number of Batches: How many batches of generation to run. (By default, one batch will retain all data generated in-memory and then flushes it before going to the next)
- Number of Rows per Batch: How many rows to generate by batch ? (To size according to server’s memory as all these rows will be retained in-memory)
- Number of Threads: How many threads to launch data generation in parallel ? The more you set, the faster generation should be. (To size according to server’s CPU)
- Credentials: To add credentials of any kind that will be used to authenticate toward the connector. (So generating to AWS will require AWS access keys, toward HDFS, probably a keytab). By default, Datagen has only credentials set in its configuration file.
Note: Total number of rows generated will be Number of Batches * Number of Rows Per Batch
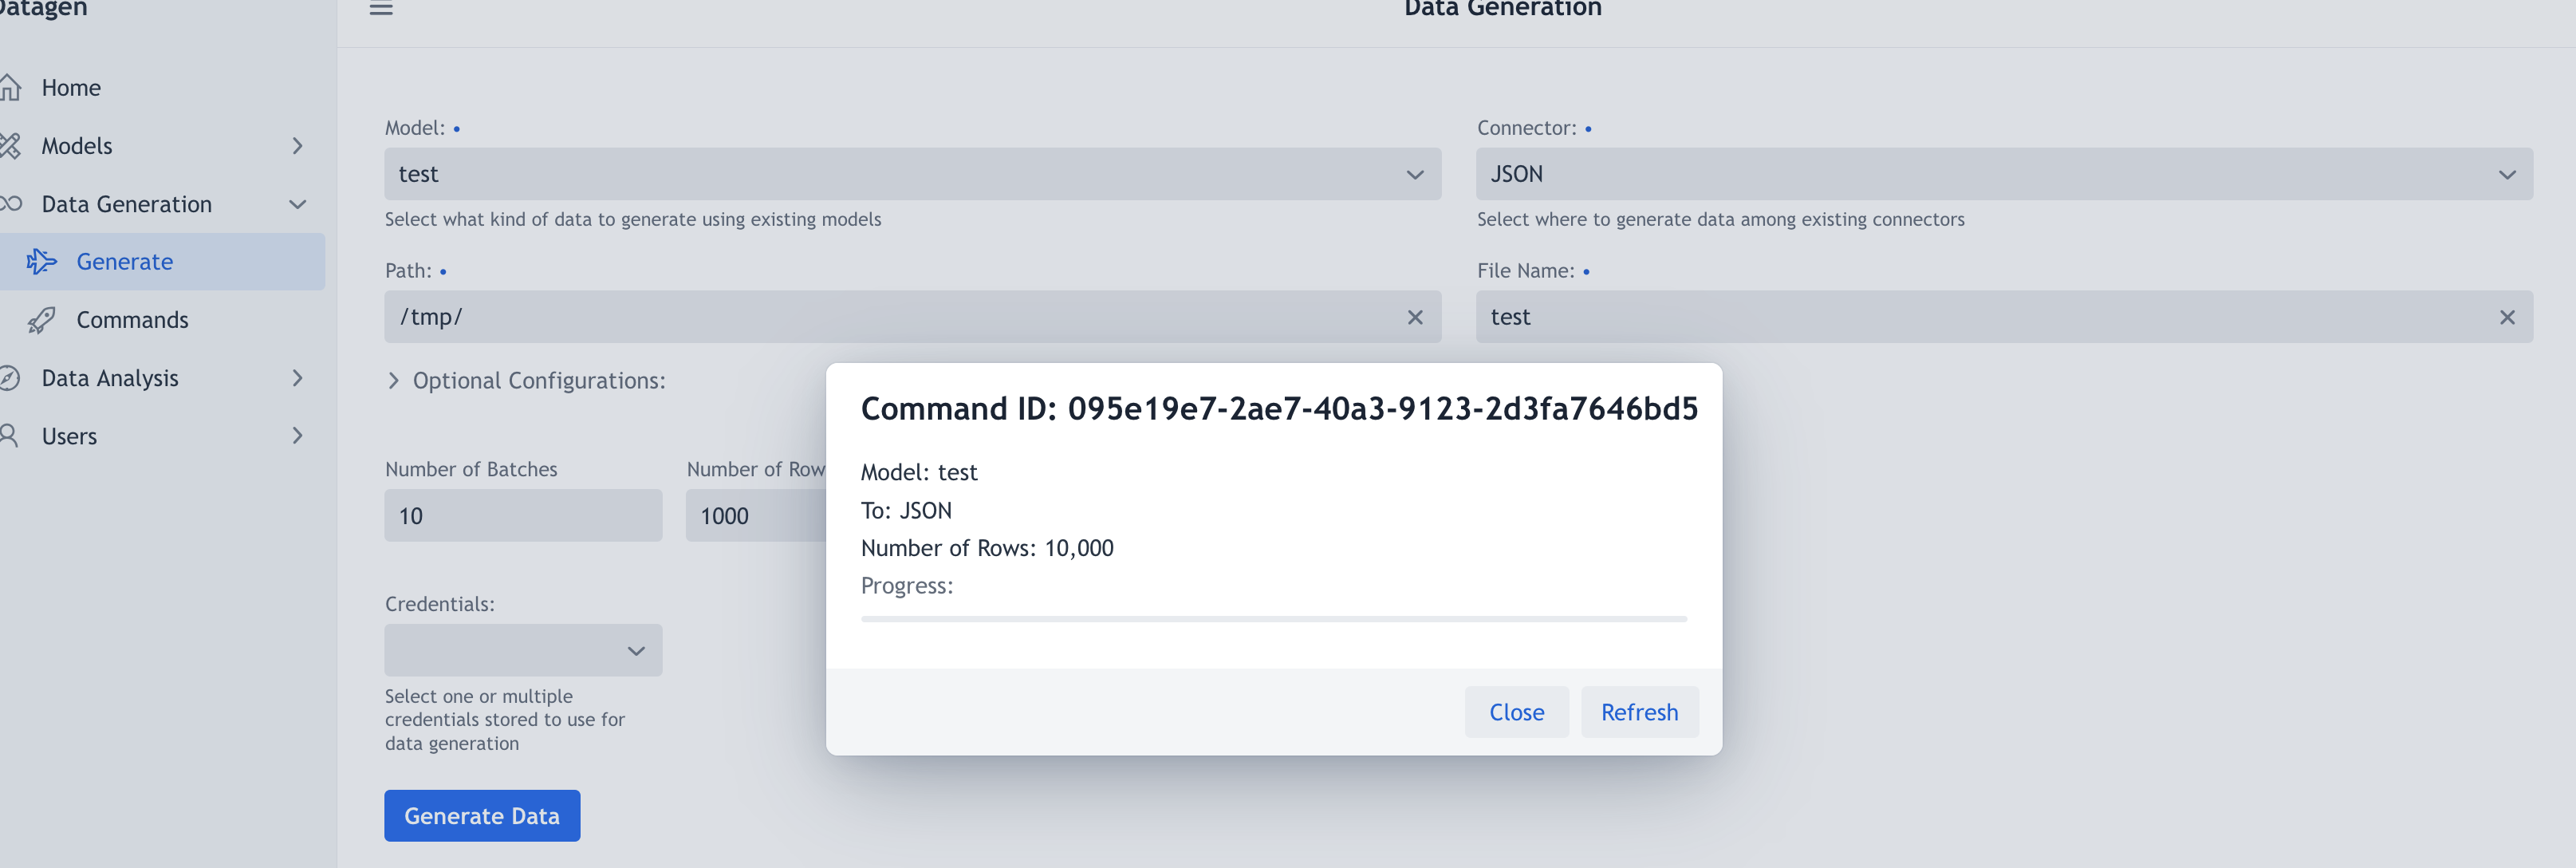
Finally, button Generate Data will create a pop-up showing that command has been well sent, a quick recap and a progress bar that needs to be refreshed with Refresh Button:

This pop-up can be closed and generation can be watched in Commands.